Google
 

Monday, August 18, 2008

Getting the Most Out of SQL Server 2000's Query Analyzer, Part II

Introduction

In the first part of this series, we took a look at how to bring up Query Analyzer 2000 and how to log in. We dealt with two issues: using different sets of credentials and problems with querying linked servers. These two issues are often frustrating for developers working with SQL Server. We left off with the promise to explore the Object Browser and more specifically, the Transact-SQL Debugger. That's where this article picks up.

When we open up SQL Server 2000's Query Analyzer for the first time, we can't help but notice the Object Browser on the left side. The Object Browser is not part of SQL Server 7.0's Query Analyzer and is our first sign that Microsoft has added some functionality to this essential client tool. We'll discuss the functionality provided in the Object Browser and dig into using the Transact-SQL Debugger. Debugging tools have been missing from the standard SQL Server client set until this latest version. Other Integrated Development Environments (IDEs) produced by Microsoft have had at least marginal debugging capabilities for a while now, dating back to the QuickBasic 4.0 days of the late eighties. It's nice to see some basic but functional debugging facilities in our bread and butter Query Analyzer.

We'll look at the following:

  • The Basic Layout
  • The Cost
  • Scripting Existing Objects
  • Scripting New Objects
  • Using the Transact-SQL Debugger

The Basic Layout

When we first open up Query Analyzer, we'll see a display similar to the following (minus the labels):

On the left hand side is a new window, the Object Browser. The Object Browser has a drop down box (A) which contains a list of all SQL Servers we've connected to since we've started Query Analyzer. It also has a tree view of all our databases for the currently selected server, common functions ranging from our @@connections to OPENXML(), as well as the various system data types (B). If we want to turn Object Browser on or off, there's a button on the toolbar (C) which allows us to click without going through the menus. There is a shortcut key, F8, which does the same.

Looking at the Object Browser, we see that there are two tabs. There is the Objects tab (A), which we've already explored a bit, and there is the Templates tab (B), which contains quick scripting templates to help us build Dynamic Definition Language (DDL) queries quickly and easily.

The Cost

Object Browser is an added tool to speed up our development efforts. Microsoft has spent quite a bit of time and resources with this new piece to our SQL Server IDE, and from outward appearances, it looks clean and usable. But what's the cost? In order to be able to provide all this information, surely it's got to hit the server, right? It does, and the actual cost is expectedly low for most functions.

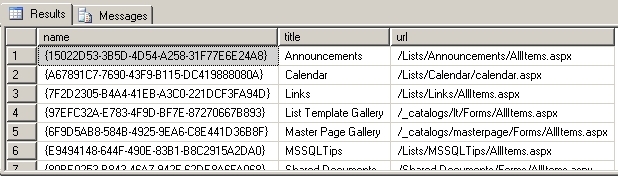
The Object Browser will require another connection to SQL Server. For instance, running the following query returns two rows:

SELECT spid, program_name
FROM sysprocesses
WHERE program_name LIKE 'SQL Query Analyzer%'

One of the rows is the initial connection Query Analyzer requires. The second is the Object Browser. Now, with respect to getting information to populate the database list, Query Analyzer already pulls that information when it starts up. As a result, the Object Browser doesn't need to make a second query to get the same information. Also, it doesn't populate user tables and the like until such time as we actually ask for the information by expanding the appropriate categories. And when it does, it only asks for the information it specifically requires. For instance, to get the information on user tables within the Foodmart database, the Object Browser will execute:

USE [Foodmart]
select id, owner = user_name(uid), name, status from [Foodmart].dbo.sysobjects where type = N'U' order by name

Object Browser queries only what it needs. It queries information only when information is requested. The cost to use this tool for our basic purposes is fairly negligible. It's only when we start using the Transact-SQL Debugger will costs begin to rise. Let's talk about that a bit.

If we're stepping through a procedure (as we'll talk about later), the Object Browser can actually lock system resources. This makes sense, as we want to ensure that nothing changes from line to line. The whole point of the debugger is to help isolate and control what's going on so we can figure out what may be wrong with a particular stored procedure. As a result, the Transact-SQL debugger should only be run in a development environment. The last thing we want to do is impair a production system as we try to troubleshoot why a particular stored procedure is failing.

Scripting Existing Objects

When we deal with a lot of databases or a particular database with a lot of objects, it can often become a chore trying to remember all the columns for a particular table or the parameters for a selected stored procedure we want to use. This is where the Object Browser can save quite a bit of time. By right-clicking on the table name we need (in this case the Categories table from the Northwind database), we can choose to script the appropriate T-SQL command we need. In this case, I'm going to script the Select to a new window:

Query Analyzer will create the new window and I'll find the following code already there for me:

SELECT [CategoryID], [CategoryName], [Description], [Picture] FROM [Northwind].[dbo].[Categories]

All the columns for the Categories table are present in the query, and I can now go in and edit the query to only return the columns I want. I could also choose to script the object to the clipboard, and then insert the code where I needed it. This is especially helpful if we're trying to build stored procedures and already have some code in a window. There's no point to scripting the object to a new window, then going through the process of cutting or copying the code, next switching to the window where we're building the stored procedure, and finally pasting the code we've just copied.

We can also script stored procedure execution. Not only will it script the parameter names, but also the data type for each parameter. This ensures we not only cover all the parameters, but also we avoid type mismatches or unexpected type conversions. For instance, we can choose to script the CustOrderHist stored procedure from the Northwind database:

When we paste the code to Query Analyzer, we get the following:

DECLARE @RC int
DECLARE @CustomerID nchar(5)
-- Set parameter values
EXEC @RC = [Northwind].[dbo].[CustOrderHist] @CustomerID

Now, one limitation to the Object Browser is that multiple objects can't be selected together to be scripted. So if we're looking to script tables to join together, we'll have to script each table individually and then manually building the join. Also, if we're looking to script database objects to put into Visual SourceSafe or some other change management repository, the Object Browser won't be of much help. There are better options with Enterprise Manager or by using DMO.

Scripting New Objects

One nice addition to Query Analyzer in SQL Server 2000 is the ability to create and use templates. Microsoft ships the basic templates for creating standard database objects and we can choose to modify these or create our own. If we've set up SQL Server 2000 with the default paths, we'll find the folders containing our templates in C:\Program Files\Microsoft SQL Server\80\Tools\Templates\SQL Query Analyzer with a folder structure that exactly matches the tree view for the Templates tab. Here is the Create Procedure Basic Template:

-- =============================================
-- Create procedure basic template
-- =============================================
-- creating the store procedure

IF EXISTS (SELECT name
FROM sysobjects
WHERE name = N''
AND type = 'P')
DROP PROCEDURE <procedure_name, sysname, proc_test>
GO

CREATE PROCEDURE <procedure_name, sysname, proc_test>
<@param1, sysname, @p1> <datatype_for_param1, , int> = <default_value_for_param1, , 0>,
<
@param2, sysname, @p2> <datatype_for_param2, , int> = <default_value_for_param2, , 0>
AS
SELECT
@p1, @p2
GO

-- =============================================
-- example to execute the store procedure
-- =============================================
EXECUTE <procedure_name, sysname, proc_test> <value_for_param1, , 1>, <value_for_param2, , 2>
GO

If we look closely, we see several structures of the format scattered throughout the template file. These structures can be replaced by going to the Edit menu and selecting Replace Template Parameters or by using the shortcut Ctrl+Shift+M.

.

When we choose to replace the template parameters, a dialog box comes up where we can edit the parameters.

Once we click Replace All, SQL Server will take care of making the changes for us. As a result, we can quickly build the skeleton structure for our stored procedures and other database objects and use templates to save on typing. Not only will this speed up our writing code, but it'll also reduce a little on the typos.

But what if the standard template isn't enough? Where I work, stored procedures have to be commented in a certain fashion. The Create Procedure Basic Template doesn't have the comment structure I need. I can edit it, or I can create my own. I chose to do the latter, adding the comment block as so:

-- =============================================
-- Create procedure with comments
-- =============================================
-- creating the store procedure

IF EXISTS (SELECT name
FROM sysobjects
WHERE name = N''
AND type = 'P')
DROP PROCEDURE <procedure_name, sysname, proc_test>
GO

/***************************************************************************************************************
Written By :
Date :
Purpose :
Input Params : <@param1, sysname, @p1>, <@param2, sysname, @p2>
Output Params : <@outparam1, sysname, @op1>
Updates :
***************************************************************************************************************/
CREATE PROCEDURE <procedure_name, sysname, proc_test>
<@param1, sysname, @p1> <datatype_for_param1, , int> = <default_value_for_param1, , 0>,
<
@param2, sysname, @p2> <datatype_for_param2, , int> = <default_value_for_param2, , 0>
AS
SELECT
@p1, @p2
GO

Having saved it as Create Procedure with Comments.tql in C:\Program Files\Microsoft SQL Server\80\Tools\Templates\SQL Query Analyzer\Create Procedure, I can choose it like any other stored procedure template and have my comment block with parameters that can be replaced. This will ensure every stored procedure I create meets my organization's standards for commenting without me having to either type in the entire comment block or find an existing stored procedure and copying the comment block from it.

Transact-SQL Debugger:

The Transact-SQL Debugger is probably the biggest addition to SQL Server 2000's Query Analyzer. Prior to SQL Server 2000's release, I would see postings asking if anyone knew of a good debugger for stored procedures in SQL Server (then 7.0). With SQL Server 2000, that deficiency has been remedied, but the Transact-SQL Debugger is not readily visible. In order to get to the debugger, we have to use the Object Browser or the Object Search (from the Tools menu) to list the stored procedure. We then right click on it, and select Debug:

A new dialog box comes up which lists the stored procedure and allows us to set the values of the parameters:

I'll enter Seafood for @CategoryName and 1999 for @OrdYear in order to be able to trace through the stored procedure. Notice below the parameters there is a check box for Auto roll back. This ensure that when we are done tracing through the stored procedure, any changes it made will be rolled back. If we want our changes to become permanent, we'll need to uncheck this box. Once we have set our parameters and decided upon Auto roll back, we can click Execute, and that'll take us to the debug window:

We have the code before us at the top of the debug window. Notice the yellow arrow to the left of the code. This arrow tells us what line we're on. Below the code we see windows where Query Analyzer is tracking both the local and global parameters, as well as the current Callstack. Finally, at the bottom we see the Results Text window. Notice there is an empty row in the Global Parameters window. If we have other global parameters we want to watch (e.g. @@IDENTITY), we can add them and track their values as we debug the stored procedure.

In order to use the Transact-SQL Debugger, we have to be familiar with the various commands available to us. The commands exist as both buttons on the toolbar as well as keyboard shortcuts. Let's look at them:

Button Command Purpose
Go (F5) Executes the stored procedure in debug mode until either a breakpoint or the end of the stored procedure is reached.
Set Breakpoint (F9) Toggles a breakpoint on or off where the cursor currently is. A breakpoint will be marked by a red circle to the left of the line. Execution will be paused when a breakpoint is reached.
Clear All Breakpoints (Ctrl+Shift+F9) Removes all breakpoints. This will allow Go to process through the entire stored procedure.
Step Into (F11) Steps through the stored procedure line-by-line. The next line of the stored procedure will execute, and then execution will be paused. This is especially helpful if we're trying to see the procedure flow since we can follow one line at a time, at our own pace.
Step Over (F10) Also steps through the stored procedure line-by-line. The difference between Step Into and Step Over can only be seen if we make calls to other stored procedures. Using Step Into, we can step through called stored procedures line-by-line as well.

However, using Step Over executes the called stored procedure in its entirety and puts us at the next line in the current stored procedure. We'd use Step Over for a called stored procedure when we know that stored procedure is correct and working properly. We don't need to go line-by-line throught it, and Step Over ensures we don't. If we're not sure about the called stored procedure, we can use Step Into to check the called stored procedure is executing as it should.

Step Out (Shift+F11) Executes the remaining lines, until a breakpoint or the end of the stored procedure is reached. If we've gone into Step Into or Step Over mode, and we no longer desire to go line by line, we use Step Out.
Run To Cursor (Ctrl+F10) This works like a breakpoint except it doesn't require us to explicitly set one. We position our cursor in the stored procedure wherever we want execution to pause, and then we use Run To Cursor. The stored procedure will execute until it reaches the line our cursor is on and then it will pause.
Restart (Ctrl+Shift+F5) Restarts the stored procedure from the beginning. Helpful if we've been stepping through and we realize we missed something.
Stop Debugging (Shift+F5) Stop Debugging sounds like it would end debug mode, but it actually means stop the current debugging step-through. We'll still remain in debug mode, which means we can start debugging again by using Go. This is useful if we need to stop debugging and we aren't planning on restarting immediately.

The best way to get comfortable with the Transact-SQL Debugger is to "play." This is actually true of any debugger for any IDE whether it is part of Query Analyzer, Visual Studio, Forté for Java, or some other product. Pick stored procedures that work perfectly well, ones which you are very familiar with. Work with the parameters for the stored procedures, set breakpoints, and use the various Step commands. Once you're comfortable with that, take working stored procedures, alter them so that still pass syntax checks, but the code does something other than what is normally expected. Experiment with the debug commands to get to the code that's been altered. The idea is to get comfortable with the debug environment for the day when it'll be used on a new or relatively unfamiliar stored procedure.

Now, for our current example, by playing with the Debugger and the SalesByCategory stored procedure, we can choose to step through line-by-line. If we do, we'll notice that our local parameter @OrdYear will change values from the 1999 that we typed in to the value 1998. The reason is the following set of code within the stored procedure:

IF @OrdYear != '1996' AND @OrdYear != '1997' AND @OrdYear != '1998'
BEGIN
SELECT @OrdYear = '1998'
END

@OrdYear isn't 1996, 1997, or 1998, and as a result the stored procedure is going to change it! Had we not stepped through the stored procedure, we might never have realized why we kept getting 1998 results for Seafood. This is why the Debugger can really be of help. By going line-by-line and watching the values for the local parameters, we can see if and when those parameters change. This is why single step debuggers are worth the time it takes to learn them and get comfortable with them. And once we are comfortable with the Transact-SQL Debugger, we'll be able to use it to debug stored procedures on SQL Server 6.5 SP2 and higher SQL Servers. As a result, those of us running in mixed environments can leverage the Transact-SQL Debugger across all our SQL Server platforms.

Wrap Up

In this article we talked about the Object Browser, a new feature in SQL Server 2000's Query Analyzer. The Object Browser allows to rapidly develop Transact-SQL code by auto-scripting for us not only existing database objects but also by providing templates for new ones. We can script the execute of a stored procedure, complete with all parameters, or the insert or delete on a table, with all the columns listed for our convenience. By using templates we can fill out predefined parameters and generate the skeleton T-SQL code for creating a new database object. We can use the stock templates or create our own.

We also talked about the Transact-SQL Debugger. The Transact-SQL Debugger represents a sizeable upgrade on our debugging capabilities with respect to stored procedures. Not only does it work against SQL Server 2000 servers, but also on any SQL Server from SQL Server 6.5 SP2 and up. The Transact-SQL Debugger gives us the ability to go line-by-line and carefully watch how parameters change. It allows us to set breakpoints to run to, much like other single step debuggers. Because of these new-found debugging capabilities, we can often save considerable time finding bugs in our code that otherwise would be difficult to extract.

Hopefully you've found this brief synopsis of the Object Browser helpful. In the next article we'll scale back a bit and look at how to configure our Query Analyzer environment for our liking. We'll look at modifying the toolbars, setting connecting settings, and defining shortcut keys. We'll also look briefly at changing how we output result sets. By examining the various options available to us, we can customize the Query Analyzer for maximum use.

By Brian Kelley, 2002/03/05

Sunday, August 17, 2008

Getting the Most out of SQL Server 2000's Query Analyzer, Part I

Introduction

The first time I started up Query Analyzer after upgrading my client tools from SQL Server 7 to 2000, I noticed the Object Browser immediately. Playing around a bit, I tinkered with the Transact SQL debugger and generally just explored some of the new functionality. Most of it was quite useful, but not exactly straight-forward. When I began looking into getting more out of some of these new features, I found the documentation on Query Analyzer was intermingled with the rest of Books Online and I thought then how it could easily be overlooked. About a month ago, I was talking with a developer about some issues he was having debugging code, looking at execution plans, and trying to determine the best places to put indexes. I started asking him some questions about how the development team was using Query Analyzer and quickly realized that they saw it basically as an environment to type in their stored procedures and write simple queries. They weren't using any of the main features, and the reason was because they weren't aware of how to use them.

This series will hopefully be a helpful "How To" guide to maximizing the use of Query Analyzer. There are quite a few great database tools out there other than Query Analyzer, but the main advantage of Query Analyzer is it comes with SQL Server, installs by default as part of the client set, and is very powerful in its own right. If we're supporting SQL Server, we'll always have Query Analyzer.

The key is to understand what Query Analyzer can do for us, the kind of information it can provide us, and its limitations. This article will cover the basics of starting up Query Analyzer and connecting to SQL Server. I'll introduce the various ways to execute Query Analyzer and talk a bit about authentication methods and a new tool provided for us by Windows 2000. We'll also take a quick look at a problem with linked servers, Query Analyzer (or any client, for that matter), and Windows authentication.

For those who've been using Query Analyzer, most of the information in this article will be old hat but hopefully there will be some new information for everyone. We'll start from the very beginning, to ensure we leave no gaps. Query Analyzer has a lot of functionality, and some of it can get pretty in depth. As with most good tools, it takes a little bit of work and some time to really learn all of the features and options in order to put the tool to maximum effect. So without further ado, let's dive right in!

Starting Query Analyzer

There are several ways to start Query Analyzer. The first is from the Programs sub-menu:

The second is from the Tools menu of Enterprise Manager:

A third way is to simply execute the program (isqlw) from Start >> Run:

We'll see more about bringing up Query Analyzer via isqlw in a bit when we talk about the RunAs command.

Connecting to a Server

Upon entering Query Analyzer, we're prompted to connect to a server. The connection dialog box is the same we'll see in other SQL Server tools such as Profiler. With it we can choose the server to connect to, as well as the connection method:

One area that I've seen issues with is understanding the two different authentication methods. I have seen developers take their NT (Windows) authentication and try and use the username and password using SQL Server authentication. This usually occurs when the developer is logged into the workstation as one user and is trying to get access to the SQL Server using another NT login.

Windows authentication deals with domain or local computer user accounts. SQL Server authentication deals with SQL Server logins created on the particular SQL Server, which means SQL Server must be running in mixed mode. Obviously, one cannot authenticate Windows accounts using SQL Server authentication.

Under Windows NT 4.0, there aren't too many options. Windows authentication is going to match the user account logged into the workstation. With Windows 2000, however, there is the RunAs command. The general syntax is:

RUNAS [/profile] [/env] [/netonly] /user: program

An example of its use to bring up Query Analyzer is:

runas /user:MyDomain\User2 isqlw

This will allow us to use Windows authentication with Query Analyzer under the User2 account. The User2 account is only active for Query Analyzer. When we exit Query Analyzer, nothing will be running under the User2 context.

Digressing a little, this is a good practice for privileged accounts. Best practices state that we shouldn't do day-to-day activities such as checking email, writing status reports, etc., using a privileged account because whatever account we use for those tasks is the most vulnerable to compromise. From a risk perspective, if a non-privileged account is compromised, the potential damage is far less than if a privileged account is compromised. By utilizing the RunAs command, we can carry out our daily tasks with a non-privileged account, and if we have a second account with the appropriate privileges, we can use it only in the specific context of certain applications. For other SQL Server utilities, given default paths, here are the runas commands:

Enterprise Manager (SQL Server 2000):

runas /user:MyDomain\User2 "mmc.exe /s \"C:\Program Files\Microsoft SQL Server\80\Tools\BINN\SQL Server Enterprise Manager.MSC\""

SQL Profiler:

runas /user:MyDomain\User2 profiler

As can be seen, the RunAs command is very helpful from a security perspective. Running in a non-privileged account with the ability to go to privileged mode has been around in the Unix world for a long time with the su command (superuser). It's nice to see this security measure has come around to the Windows world.

Linked Servers, NT Authentication, and "Double Hop"

One other issue I've seen that can throw a developer or DBA into fits involves querying against linked servers. The root of the issue involves Windows authentication and the concept of the "double hop," which is prohibited by Windows authentication under NT non-Kerberos environments (such as NT 4.0).

Most of the time when we're using Query Analyzer, we're sitting at a workstation accessing a physically different computer running SQL Server. For instance:

In SQL Server we can create a linked server from one SQL Server to another. Diagramming this:

However, we may be running QA from our workstation, and we're writing queries on one SQL Server that may need to include data from a linked server.

If we're using SQL Server authentication to get to the first SQL Server, and the SQL Server uses SQL Server authentication to get to the linked server, we can get at our data without issue. SQL Server is able to make the connection to the second server by using the SQL Server login we specified when we created the linked server.

However, when we connect to a SQL Server using Windows authentication (specifically NTLM, the method of authentication for NT 4.0) and that SQL Server then attempts to use Windows authentication to the linked server, we'll get one of the following errors:

Server: Msg 18456, Level 14, State 1, Line 1 Login failed for user '\'

or

Server: Msg 18456, Level 14, State 1, Line 1 Login failed for user 'NT AUTHORITY\ANONYMOUS LOGON'

The problem is with NTLM. SQL Server is having to take the Windows authentication passed to it by the client and then authenticate using the same Windows authentication to the second server. If we think of going from one computer to another as a hop, we have to traverse two hops to get from client system to the linked server. NTLM does not support such a "double hop" and as a result, when the second hop is attempted, SQL Server must try and make an anonymous connection, since it has no other credentials which to use.

As a result, we fail and receive the error message above. This problem is not limited to SQL Server, as it can occur in FrontPage 2000 under similar conditions when trying to work with security. Kerberos does not have such a limitation and SQL Server 2000 running on Windows 2000 with Active Directory and Kerberos will not have the same issue. Windows authentication can then traverse the double hop. If that's not our setup, however, the only workaround is to make the second connection via SQL Server authentication.

This gets around the double hop issue, though admittedly it means the second SQL Server has to run in Mixed Mode. Now, one thing to remember is if we're running Query Analyzer at the console of the SQL Server and not from a separate client is that we'll not encounter the double hop. The double hop occurs when we have to go from one computer to another, and then finally to a second. Also, if we have jobs on a particular server that need to access a linked server, those jobs can work with a link via Windows authentication, since we're still only talking about a single hop.

Wrap Up

In this article we've covered the basics of starting up Query Analyzer and authenticating on SQL Server. We looked at several ways to execute Query Analyzer and we also looked at the RunAs command. The RunAs command allows us to be logged into our Windows 2000 or higher workstation with a non-privileged account while still being able to carry out our administrative duties with the level of permissions we need. We also took a quick loop at authentication and the problems we encounter with the double hop.

In the next article we'll take a closer look at the Object Browser and the Transact-SQL Debugger. The Object Browser is the most visible new feature of Query Analyzer, so we'll take the time to look at it in some detail. We'll also walk through the use of the Transact-SQL Debugger so that we might leverage it for future development efforts. A good understanding of these two tools can save us a bit of time here and there and so we'll drill down on them.


References

By Brian Kelley, 2002/02/21


continue ...

Getting the Most Out of SQL Server 2000's Query Analyzer, Part II


SQL TRUNCATE TABLE

Transact-SQL Reference (SQL Server 2000) TRUNCATE TABLE

Removes all rows from a table without logging the individual row deletes.

Syntax

TRUNCATE TABLE name

Arguments

name

Is the name of the table to truncate or from which all rows are removed.

Remarks

TRUNCATE TABLE is functionally identical to DELETE statement with no WHERE clause: both remove all rows in the table. But TRUNCATE TABLE is faster and uses fewer system and transaction log resources than DELETE.

The DELETE statement removes rows one at a time and records an entry in the transaction log for each deleted row. TRUNCATE TABLE removes the data by deallocating the data pages used to store the table's data, and only the page deallocations are recorded in the transaction log.

TRUNCATE TABLE removes all rows from a table, but the table structure and its columns, constraints, indexes and so on remain. The counter used by an identity for new rows is reset to the seed for the column. If you want to retain the identity counter, use DELETE instead. If you want to remove table definition and its data, use the DROP TABLE statement.

You cannot use TRUNCATE TABLE on a table referenced by a FOREIGN KEY constraint; instead, use DELETE statement without a WHERE clause. Because TRUNCATE TABLE is not logged, it cannot activate a trigger.

TRUNCATE TABLE may not be used on tables participating in an indexed view.

Examples

This example removes all data from the authors table.

TRUNCATE TABLE authors
Permissions

TRUNCATE TABLE permissions default to the table owner, members of the sysadmin fixed server role, and the db_owner and db_ddladmin fixed database roles, and are not transferable.

Friday, August 15, 2008

Deleting Data in SQL Server with TRUNCATE vs DELETE commands

Problem
There are two main keywords used for deleting data from a table: TRUNCATE and DELETE. Although each achieves the same result, the methods employed for each vastly differ. There are advantages, limitations, and consequences of each that you should consider when deciding which method to use.

Solution
Deleting Data Using TRUNCATE TABLE

TRUNCATE TABLE is a statement that quickly deletes all records in a table by deallocating the data pages used by the table. This reduces the resource overhead of logging the deletions, as well as the number of locks acquired; however, it bypasses the transaction log, and the only record of the truncation in the transaction logs is the page deallocation. Records removed by the TRUNCATE TABLE statement cannot be restored. You cannot specify a WHERE clause in a TRUNCATE TABLE statement-it is all or nothing. The advantage to using TRUNCATE TABLE is that in addition to removing all rows from the table it resets the IDENTITY back to the SEED, and the deallocated pages are returned to the system for use in other areas.

In addition, TRUNCATE TABLE statements cannot be used for tables involved in replication or log shipping, since both depend on the transaction log to keep remote databases consistent.
TRUNCATE TABLE cannot used be used when a foreign key references the table to be truncated, since TRUNCATE statements do not fire triggers. This could result in inconsistent data because ON DELETE/UPDATE triggers would not fire. If all table rows need to be deleted and there is a foreign key referencing the table, you must drop the index and recreate it. If a TRUNCATE TABLE statement is issued against a table that has foreign key references, the following error is returned:

Deleting Data Using DELETE FROM Statement

DELETE TABLE statements delete rows one at a time, logging each row in the transaction log, as well as maintaining log sequence number (LSN) information. Although this consumes more database resources and locks, these transactions can be rolled back if necessary. You can also specify a WHERE clause to narrow down the rows to be deleted. When you delete a large number of rows using a DELETE FROM statement, the table may hang on to the empty pages requiring manual release using DBCC SHRINKDATABASE (db_name).
When large tables require that all records be deleted and TRUNCATE TABLE cannot be used, the following statements can be used to achieve the same result as TRUNCATE TABLE:

  • DELETE from "table_name"
  • DBCC CHECKIDENT("table_name", RESEED, "reseed_value")

DBCC CHECKIDENT with RESEED

Wednesday, August 13, 2008

SQL Server Clustering and Consolidation - Balancing Resources

Problem
In my SQL Server environment we initially clustered to support a consolidation effort in which we were focusing on elimination of approximately thirteen Microsoft SQL Server 2000 and 2005 instances. Along the way we had a mission critical application that was backed by SQL 2000 that was budgeted without hardware for supporting a dedicated SQL Server instance. We were forced into hosting this database on our relatively new SQL 2005 Enterprise cluster as a result. Our consolidation effort essentially ended on the day that decision was made. I've finally been able to make the case that this application needs a dedicated SQL environment. What started as a single database for supporting this product has morphed into an eight-database suite that, through design and support, requires more than its share of system (and Database Administrator) resources because of where it is hosted.

Just because you have disk space, plenty of memory, and abundant CPU does not mean you can pile databases onto an instance of Microsoft SQL Server; you need to pay attention to load balancing. In the case of a clustered environment I take it one-step-removed: a step I like to call node balancing.

Author's Note: This is part three of a continuing series on Microsoft SQL Server 2005 Clustering. Some of the terminology used in this tip and future clustering tips in the series were defined and explained in parts 1 and 2. While parts 1 and 2 are not pre-requisites for this tip it is advised that you also read those tips in this series (and any future tips as well!)

Solution

Node Balancing

Microsoft Clustering Services are not designed for load balancing, but rather failover in the event of hardware failure. Therefore when I play off the concept of load balancing what I am actually referring to is the process by which I make a determination of which databases to host on my various SQL Server instances. I base this determination on a number of factors:

  • Relative importance of the application to the entity
  • Amount of resources required by the database(s) that support this application
  • Level of access required by the support staff (possibly Third-Party Vendor)
  • Architectural considerations
  • Collation requirements

Each one of these factors may determine how I formulate my architectural recommendations for hosting any particular database that is a candidate for clustering. However it is usually a combination of factors that determine why I may choose to host a database or set of databases on their own cluster, own active node in a cluster, or on a shared node with multiple non-related databases. I detail each of these factors next with recommendations based upon my experience for each.

Relative Importance of the Application

There are two distinct reasons for clustering Microsoft SQL Server: consolidation and fail-over. Consolidation will allow you to host multiple databases together on a single SQL instance up to a point where the resources of the server can no longer support additional database activity. Clustering for failover allows you to maintain an actively-accessible database instance in the event a node in the cluster encounters stress or damage and a shutdown occurs. Databases that are considered "mission critical" should be hosted in such a way that affords high-availability. For the purposes of this tip we will state that the solution we're recommending for that purpose is failover clustering. Conversely, databases that don't meet the requirements of being "mission critical" do not necessarily need to be available if a hardware failure is encountered. They may be able to be down for a short period of time, perhaps even for days depending upon their usage patterns. These databases may be hosted on the cluster only for the sake of consolidating multiple instances worth of databases on a more powerful clustered instance of SQL Server. More powerful? Certainly. If you're going to take advantage of clustering I strongly suggest that you do so based upon the 64-bit platform and with Enterprise Edition SQL Server. The limitations against Standard Edition SQL (no online indexing, limitation on only two nodes in a cluster) make it a less-expensive, yet less scalable solution.

For the basis of this tip I will break down the database classes, based upon criticality into three tiers. These are the classifications we use in our company and it works well for us (so far).

  • Tier 1 - Your company's most-important databases. You may perhaps have only one of these - maybe as many as a half dozen. These are the systems that keep your company running or service your customers with their critical data requirements: databases providing data related to Patient Care, Online Banking, or Criminal History information would be candidates for this class of databases.
  • Tier 2 - These are the databases that host data for applications that, while important, may allow some appreciable measure of downtime. Payroll , Educational Registration, Annual Employee Performance Review programs, and E-Commerce sites would fall into this category.
  • Tier 3 - We all have plenty of these in our environments. These are the databases that get created because someone in accounting wanted to "upsize their Excel Database". These databases typically support department-level internal applications that run during business hours and can be down for periods of time with effect only on productivity of a select group on individuals.

Let's take care of the easy choice first: Tier 3 databases should be hosted together. There, that was easy. Seriously, we do not need to dwell on the Tier 3 databases, we need to focus our attention on answering the following questions:

  • Should Tier 1 databases be hosted on a dedicated node in shared cluster or should they be hosted in their own active-passive cluster?

I've advocated both sides of this debate at different points in time. By placing the Tier 1 database on a dedicated node within a larger, shared cluster you still reap the benefits of clustering, with only a single additional server to manage. (So long as there is already a passive node in the cluster.) If you were to dedicate a complete cluster for the sole purpose of hosting this database you must add at least two new servers to your environment along with all the maintenance and administration that entails - not only for you, but for the multitude of teams and staff that are responsible for supporting a server in today's IT environments. One should also not forget the added costs associated with yet another passive node (hopefully) just sitting idle in your data center. Conversely, what happens if this database or one of the others in the cluster require a patch or configuration change at the server level? In a clustered architecture this requires all nodes in the cluster to be patched regardless of whether the database is currently being hosted on the server. You need to be prepared for a failover situation and this requires that all nodes in the cluster be identical in content and configuration from a software perspective. Therefore you may find yourself in a situation where a Tier 2 or Tier 3 database causes compatibility issues for a Tier 1 database in your shared cluster - even if the Tier 1 database is hosted on its own node.

Recommendation: If you have the funding, Tier 1 databases, those that are most-critical to the well being of your company and customers, should be hosted on their own cluster. Furthermore, it is recommended that you also provide additional redundancies to protect against media (disk) corruption on the SAN volumes assigned to the database via third-party SAN replication tools or by native SQL technologies such as replication, database mirroring, or log shipping.

  • Should Tier 2 databases be hosted on the same node as Tier 3 databases or should they be on their own dedicated node in a shared cluster?

Just because a database may be classified as Tier 2 using the definitions I've presented does not make it unimportant. However, they seldom would require their own dedicated cluster unless you're company manufactures money or has worked out that whole alchemy process of turning rocks to gold. These databases would need to compete for resources equally against less-important (and possibly more intrusive databases) if hosted on the same node with Tier 3 databases so in most situations that architecture is not advised either. This is where you need to also take other factors such as resource requirements and activity trends into consideration in attempts of balancing a node for support of perhaps one or more Tier 2 databases.

Recommendation: if funding permits host Tier 2 databases on their own node in an shared cluster environment. If resources allow, and your benchmarking proves that multiple Tier 2 databases can co-exist on the same node, host those databases together. Considerations need to be taken for any database that is hosted on a shared Microsoft SQL Server instance. Failovers, maintenance, and downtimes will impact all databases on the instance.

Amount of Resources Required by The Database

I support hundreds of databases in my environment. We have very large databases that have very little activity. We have relatively small databases that have hundreds of concurrent static connections that remain open all day long. We have a little bit of everything in between. What may be the most consuming task for a Database Administrator is determining just what usage patterns each of your databases have. The process for collecting this information is outside the scope of this tip, but I'll make suggestions for resources at the end of this tip on how to determine load over time for a specific database. Once you've collected this data, the goal is to balance out the resource requirements across all your databases you plan on hosting on a given instance. What makes this process extremely difficult is that some items that impact resources greatly may be out of your control - even as the Database Administrator. A properly-indexed INSERT query may run in fractions of a second, however that same query, with inadequate indexes or out-of-date statistics, may run for minutes or worse. If this is a database that was developed in-house you may have the ability and rights to correct the issue by adding or altering the indexes. If this is a commercially-developed database your company purchased you may have the ability to make similar changes, but may be precluded from doing so by the nature of an existing support agreement with the vendor. There is also the impact of application life cycles. Your company comes to rely more (or perhaps less if the case may be) on a database over time. This means your initial performance monitoring results used to determine how and where to host a given database may become outdated. The information you collect over a sampling period may not be indicative of the database activity or impact later in your production environment.

This is the grayest of gray areas - a sliding scale of metadata - one of the leading causes of premature baldness, depression, and substance abuse by Database Administrators. Unfortunately it is also an important process in determining the hosting structure for your databases. I highly recommend rounding up whenever possible for the sole reason that it is better to have excess resources sitting idle on your database servers than finding yourself in need of resources when your databases need it most.

Recommendation: Use SQL Server Performance Monitor and Profiler to monitor activity against candidate databases for clustering to best determine high and low points in activity throughout a typical week in order to find databases that may be compatible for co-hosting on a shared SQL Server instance in your enterprise's cluster.

Level of Access Required by Support Staff/Vendor

So we move from difficult to easy. This really is a simple line-in-the-sand for most Database Administrators. On one side of the line: Database Role Rights. The other side of the line: Server Role Rights. If the support team (be they internal or third-party) is agreeable to having their permissions to a SQL instance capped at Database role rights (db-owner role rights or less) then this makes the database a candidate to be hosted on a shared SQL instance. It is also quite common that a support team would need to have certain role permissions in msdb to support any jobs associated with their database(s). I would still consider this a candidate for a shared database environment. However, if the vendor or support team mandates that they have any level of Server Role membership (System Administrator, Database Creator, Security Administrator, etc.) then they are going to be isolated to a dedicated SQL instance. The reason is that it is the primary responsibility of the Database Administrator to isolate access to only those individuals, teams, or entities that have legal, ethical, or commercial rights on any given database. If you allow a vendor for database X to have server-level permissions on a SQL instance they could conceivably affect every other database on that instance.

Recommendation: If you can not limit non-DBA access to database-only rights, and server-level permissions, role rights, or securables are required by the application support staff then the database(s) in question should be on a dedicated node within your cluster.

Architectural Considerations

This category exists for only a single question: is there a mandate, by either the structure of the application and database or by support agreements, that the application and the database must reside on the same physical server? If so, not only should you not look at clustering for this solution, but you should definitely plan to dedicate an instance to just the database(s) that support this application.

If the program architecture requires the database to reside on the same physical server as the application, web, or other non-SQL Server components then do not host the database within your cluster. Instead dedicate a standalone SQL instance for the database(s) and provide redundancy/high-availability by other means such as replication, database mirroring, or log shipping.

Collation Requirements

Granted, in SQL Server 2005, the collation settings for the databases can be different from the collations for the system databases. However, it is critical that you realize that there are implications when an vendor mandates their databases run under a specific non-standard collation. Typically the issue is tempdb. Think of all the processing that occurs in tempdb: this is where temporary objects are created for all databases such as temp tables, table variables and cursors. Work tables used by SQL Server to internally sort data are created in tempdb. Issues arise when tempdb is a different collation than the user database and results of computations may not match expectations. My suggestion when non-standard collations are specified is to ask if this is a requirement or a preference. If a requirement ask for specific reasons why this collation is required. (You'll be shocked how many times vendors will erroneously cite "That's what Microsoft's documentation states!") If a non-standard collation is required then you're looking at a dedicated instance of SQL Server. I recently had to rebuild a cluster node only because I did not use the default collation for SQL 2005, but rather selected the same criteria piecemeal and built my own collation. Since it did not match in name to "SQL_Latin1_CI_AS", scripts in a single database running alongside 40 other databases failed a validation check.

Recommendation: If a non-standard collation is required it does not mean you can not host the database in the existing cluster, however it may require you to dedicate an instance of SQL only for this database. You may be able to set the minimum and maximum memory requirements for this instance low enough to reside on an existing node with another SQL Server instance depending upon the required resources for the database in question. You may need to dedicate a node for the SQL instance if you find resource contention between this instance and any other instances running on the same cluster node. It is best to determine if the non-standard collation is a requirement or a request.

SEO Tips - Email Marketing Tips, Getting More Email Subscribers

Growing an email list is a critical part of email marketing success. The more people you have to talk to, the more chance you have of getting a good number of people to do what you want them to do, be that click, comment or buy. In the previous article of this email marketing series we looked at getting started in email marketing, now we will look at how you can grow your list from a few to thousands of subscribers.

Size Is Not Everything

First a some caution is necessary. Size is not the main goal.

Aim to build a good quality relationship with people who want to hear from you rather than just focus on quantity.

Always target the best sources of motivated, interested subscribers, not just where you can grab handfuls of names.

Prepare

Have your sign up form visible, above the fold, but also have a subscribe page that effectively describes the benefits of signing up and that you and other people can link to. Especially if you followed the advice in the previous article and have an incentive to sign up. This is important as you will see.

Optimize

You should be continuously looking at what you are doing to see if you are being effective in attracting people to your list and if you are attracting only the right people. Unsubscribes, and the reasons for them, will tell you a great deal. Do more of what works.

10 Best Sources of Email Subscribers

OK, here is the bit you really wanted to read. Where to get lots of eager subscribers:

  1. You! - Common sense? Probably, but people really do not take advantage of all their own potential places to reach new subscribers. Build on your own touch points such as:
    1. Your blog - Content is a fantastic way to reach subscribers. Give them great content followed by a call to action to tell them why they should subscribe. Kind of like this series you are reading, if you want to not miss the next part then you will need to subscribe, right? :)
    2. Forum postings - Many forums allow you to include links back to your own site. Instead of “here is my blog / home page”, put “get tips and news right to your inbox by signing up to my newsletter”. Think about it, the people taking part in the Walrus Polishing forum will be interested in more info on that topic, especially if your postings are good.
    3. Other lists - You might already have email newsletters. Some of the topics will overlap, while others might intersect occasionally. For example, Darren launched Digital Photography School partly through mentions on ProBlogger.
    4. Email signatures - Any email interaction is a potential for a new sign up, especially email discussion lists. Do NOT harvest email addresses, put the subscribe URL in your signature with a call to action and if they are interested they will opt-in.
    5. Networking - Be it online or off, there will be a chance to put your subscribe page on your profile, business card, powerpoint … now aren’t you glad you spent time creating a compelling subscribe page?
  2. Forwards - Forwarded emails are an excellent source of new subscribers because it is both an endorsement and a free sample of your good stuff. This is why you should include subscription options or obvious and compelling web links in your subscriber messages, not for existing subscribers but those you tell. If it is too hard to sign up they will just think “interesting” then move on.
  3. MGM - “Member Get Member” or “Recommend a Friend” is a common way to get your subscribers to bring friends. Rather than just ask or hope they will forward, ask or incentivise them to use a special form. This form will send a customized email to each of their submitted friends, telling the friend about this cool thing, and optionally then delivering some goodies as a thank you. Another way to do it is give additional chances of winning a prize for each member they attract. Just be careful, this can be spammy if taken too far!
  4. Incentives - I have already mentioned incentives a fair bit, because they work. There are three ways to get sign ups from free gifts:
    1. Before - Subscriber bonus that you can’t get without giving your email address, my Flagship Content ebook is one example
    2. After - Links in the document, video pages, and so on, encourage sign up but you do not need to opt-in to get the content. This is basically how blogs work and also “watch video one, opt-in to get part two”.
    3. Before AND after - The most advanced is to give free, open content, get opt-in then reinforce subscription with further permissions. You want to build a deeper relationship, from reader, to subscriber, from subscriber to customer, and so on. Consider what I have been doing moving feed subscribers to email subscription by offering benefits over and above my daily content.
  5. Virals - A viral is basically anything that gets passed around, be it a funny video, a quiz or a small game. The same before/after approaches can be used as in the “incentives” point. The advantage of a viral is people want to pass it on, so can be used as a opt-in delivery system.
  6. Bloggers - Other bloggers are a great source of subscribers:
    1. Reviews - They review your video, download, or other incentive, their readers click to get it and opt-in.
    2. Links - Make your newsletter or incentive about a focused topic and bloggers will link it when talking about your topic.
    3. Guest posts - Mention your newsletter in your attribution line “Sign up to get more tips like these …”.
  7. List owners - Referrals from other lists work very well because these people already demonstrate a willingness to subscribe! Again, your incentive or bonus might be the way in, but also through networking and getting to know list owners you can do each other the favor.
  8. Partners - Team up with other publishers to build a new list, as Darren and I did with the ProBloggerBook.
  9. Affiliates - People will want to promote you if there is something in it for them. Offer a commission on any sales, connect your affiliate cookie to newsletter signups. Affiliates send visitors to get your free subscriber bonus, when any sales happen the affiliate gets rewarded for delivering the lead.
  10. Paid - Advertising can be very effective but always test your ROI to make sure you are getting the best price per lead.
    1. Email newsletter advertising - For a price you can get space in popular email newsletters, usually in the cost per so many thousand emails. This is a better alternative than buying lists but should still be tested before spending a great deal.
    2. Web advertising - Use pay per click or banner advertising (such as Performancing Ads) to drive people to your list using your incentive as your call to action.
    3. Offline - Classifieds and print advertising can work, just do the same as above and use your incentive to drive sign ups

Summary

There are many variations of the above tactics but they are the main ways to get people on to your list. Always build on your success by monitoring, testing and tracking your subscriber sources and developing new routes to members.

I have mentioned testing and tracking quite a bit, it is vitally important, so in the next part of this series I will go through email metrics and how they are a powerful tool in building a profitable email marketing campaign.

Saturday, August 2, 2008

How to Find Keywords in SQL Server Stored Procs and Functions

Problem
Our business users are storing some data in SharePoint lists that we need to access from our ETL process that updates our SQL Server data warehouse. Can you provide us with the details and an example of how we can do this from a SQL Server CLR function?

Solution
Windows SharePoint Services (WSS) provides an API and a number of web services that can be used to access the data in the SharePoint content database programmatically. While the content database is in fact a SQL Server database, the recommended way of accessing the data is via the API or a web service. When using the API your code has to be running on the SharePoint server; you can call the web service from just about anywhere. Therefore, the web service approach provides the most flexibility and is probably the best in most cases. For a SharePoint list you can use the Lists web service. Starting with SQL Server 2005 you can code stored procedures, triggers, user-defined functions, user-defined aggregates, and user-defined types using Microsoft .NET code; e.g. Visual Basic .NET or C#. For the task at hand, a table-value function (TVF) written using the CLR would be a good choice. A TVF is a function that returns a result set. You can use the function in a SQL statement as if it were a table.

Before we proceed to walk through the code for our TVF, let's get our environment ready. By default the CLR is not enabled in SQL Server. Please refer to our earlier tip How to Return a Result Set from a SQL Server 2005 CLR Stored Procedure for the steps you need to perform to enable the CLR on your SQL Server instance.

Now let's talk about what we are going to demonstrate in the code that follows. We need a TVF that returns a result set of the SharePoint lists for a particular site. It's a good idea to refer to a SharePoint list using it's Name which is a GUID. The textual name of a SharePoint list is the Title. Users can change the Title but the GUID remains unchanged. We need a second TVF to retrieve the contents of a particular SharePoint list.

We will walk through the following steps in our code example:

  • Setup the web service proxy class
  • Review the C# code sample for the CLR functions
  • Generate a static serialization assembly
  • Deploy the CLR functions

Web Service Proxy Class

When you write .NET code that uses a web service, you invoke the web service methods via a proxy class. The proxy class has methods that mirror the web service; you call the methods on the proxy class and the proxy class actually communicates with the web service. To create the proxy class you simply need the URL of the web service. In a Visual Studio project you can create the web service proxy by right clicking on the Web References node in the Solution Explorer. Alternatively you can create the web service proxy by running the WSDL utility which is a command line tool. In a Visual Studio project you fill in the following dialog:

Note that the URL for your web service will be different than the one shown above which exists in a Virtual PC. You can specify anything you like for the Web reference name.

The command to create the web service proxy using the WSDL utility is as follows:

WSDL /o:ListsService.cs /n:WSS http://192.168.2.66/_vti_bin/Lists.asmx

The output from WSDL is a class file that you manually add to your Visual Studio project or include in your compile. The /n option specifies the namespace for the generated code. The advantage of using WSDL is that you can fine tune the generation of the proxy code; there are quite a few command line options available. Whether you use Visual Studio or WSDL, you wind up with the proxy class.

You can find WSDL.EXE in the folder C:\Program Files\Microsoft Visual Studio 8\SDK\v2.0\Bin (assuming Visual Studio 2005).

CLR Code Sample

The following C# function (and one that follows it) will return a result set of the SharePoint lists in a particular site:

    [SqlFunction(SystemDataAccess = SystemDataAccessKind.Read,
FillRowMethodName = "GetListInfo")]
public static IEnumerable GetListCollection(SqlString url)
{
DataTable t = new DataTable();
WindowsImpersonationContext ctx = null;
WindowsIdentity id = SqlContext.WindowsIdentity;
try
{
// impersonate the caller
ctx = id.Impersonate();
// create instance of web service proxy class
WSS.Lists svc = new WSS.Lists();
svc.Url = url.ToString();
svc.Credentials = CredentialCache.DefaultNetworkCredentials;
// call web service method; return as a DataTable
XmlNode node = svc.GetListCollection();
XmlTextReader rdr = new XmlTextReader(node.OuterXml,
XmlNodeType.Element, null);
DataSet ds = new DataSet();
ds.ReadXml(rdr);
t = ds.Tables[0];
}
finally
{
// undo the impersonation
if (ctx != null)
ctx.Undo();
}
return t.Rows;

The main points in the above code are:

  • The [SqlFunction] which precedes the actual function is a .NET attribute. It is used to specify metadata about the .NET object which it adorns; in this case the class. The [SqlFunction] attribute is used for a CLR function. The SystemDataAccess property is required because we will be impersonating the caller and this requires access to system tables. The FillRowMethodName property is the name of a companion function (to be discussed below); this function actually returns the result set a row at a time.
  • A CLR TVF must return an object that implements the IEnumerable interface. This is a standard interface implemented by .NET collection classes.
  • The parameter to the function is the URL of the Lists service for a site; e.g. http://servername/_vti_bin/Lists.asmx.
  • DataTable is a class in the .NET framework that provides an in-memory representation of a table or result set. It's base class implements the IEnumerable interface required to be returned by the function.
  • The SqlContext object is automatically available in a CLR function; we use it to get the WindowsIdentity of the caller.
  • The default behavior when accessing resources outside of SQL Server is to use the credentials of the SQL Server service; in many cases this isn't appropriate as the SQL Server service's account has the bare minimum permissions required. In many cases you will need to impersonate the caller who then must have the appropriate permissions.
  • After creating the instance of the web service proxy class, we set the URL based on the value passed to the function and specify to use the current credentials which are now the caller's after the impersonation code is executed.
  • We call the web service method which returns an XML node object.
  • We transform the XML into a Data Table via the DataSet object, which is a standard class in the .NET framework which implements an in-memory copy of a collection of tables or result sets.
  • In the finally block we undo the impersonation, reverting back to the credentials of the SQL Server service account.
  • In the last line of code we return the collection of rows in the DataTable.

The second part of our code sample is the GetListInfo function which was specified in the SqlFunction attribute in the FillRowMethodName property:

    public static void GetListInfo(
object obj,
out SqlString name,
out SqlString title,
out SqlString url )
{
DataRow r = (DataRow)obj;
name = new SqlString(r["Name"].ToString());
title = new SqlString(r["Title"].ToString());
url = new SqlString(r["DefaultViewUrl"].ToString());
}

The main points in the above code are:

  • This function is called behind the scenes; we will connect the GetListCollection function above to the TVF when we deploy (in the next section). The GetListCollection function retrieves the data to be returned by the TVF; this function is called to return the result set one row at a time.
  • The object parameter value is actually a DataRow; the GetListCollection function returned a collection of DataRow objects.
  • We use the SqlString object instead of the standard .NET String class.
  • Each column in the result set is returned as an out parameter in the function.

The above functions should be implemented in a single source file (e.g. SharePointList.cs) and compiled to create a class library DLL. The sample code is available here. You can use a Visual Studio project to create the class library DLL or compile with the following command:

CSC /target:library /out:MSSQLTipsCLRLib.dll *.cs

You can find CSC.EXE in the folder C:\WINDOWS\Microsoft.NET\Framework\v2.0.50727 (assuming v2.0 of the .NET framework).

Generate a Static Serialization Assembly

When writing .NET code that accesses a web service, there are some behind the scenes things that happen to dynamically generate code used to pass data to and from the web service. This is called serialization and just think of it as a special packaging of data to and from the web service. When calling a web service from a CLR function, the SQL Server CLR implementation doesn't allow this dynamic serialization. The work around is to use the SGEN utility to create a static serialization assembly (i.e. DLL). The command line for SGEN is as follows (assuming we compiled our earlier functions into a class library called MSSQLTipsCLRLib):

SGEN /a:MSSQLTipsCLRLib.dll

SGEN creates a DLL; in this case MSSQLTipsCLRLib.XmlSerializers.dll. Both MSSQLTipsCLRLib.dll and MSSQLTipsCLRLib.XmlSerializers.dll must be deployed to SQL Server, which we will do in the next section.

You can find SGEN.EXE in the folder C:\Program Files\Microsoft Visual Studio 8\SDK\v2.0\Bin (assuming Visual Studio 2005).

Deploy the CLR Functions to SQL Server

Execute the following T-SQL script to deploy the DLLs to SQL Server and create the CLR function (create the mssqltips database if necessary or substitute an existing database name):

ALTER DATABASE mssqltips
SET TRUSTWORTHY ON
GO
USE mssqltips
GO
CREATE ASSEMBLY MSSQLTipsCLRLib
FROM 'C:\mssqltips\MSSQLTipsCLRLib.dll'
WITH PERMISSION_SET = UNSAFE
GO
CREATE ASSEMBLY [MSSQLTipsCLRLib.XmlSerializers]
FROM 'C:\mssqltips\MSSQLTipsCLRLib.XmlSerializers.dll'
WITH PERMISSION_SET = SAFE
GO
CREATE FUNCTION fn_GetSharePointLists(@url nvarchar(256))
RETURNS TABLE
(
name nvarchar(256),
title nvarchar(256),
url nvarchar(256)
)
AS
EXTERNAL NAME MSSQLTipsCLRLib.SharePointList.GetListCollection
GO

The TRUSTWORTHY option is set on to allow the external access outside of SQL Server; the default is SAFE. CREATE ASSEMBLY deploys the DLL to SQL Server. The FROM clause must point to the actual path of the DLL. PERMISSION_SET must be set to UNSAFE because of using certain .NET serialization attributes associated with the web service. Finally the EXTERNAL NAME of the CREATE FUNCTION creates the TVF and associates it to the assembly, class and function. When you include the TVF in the FROM clause of a SELECT statement, the .NET code is run and it returns a result set.

To execute the TVF, execute the following script (substitute the URL to your SharePoint site):

SELECT * FROM dbo.GetListCollection 'http://192.168.2.66/_vti_bin/Lists.asmx'

You will see output that looks something like this:

The second function that was discussed was a TVF that would retrieve the items from a SharePoint list and return them as a result set. The code is practically the same as above, but calls a different web service method to retrieve the list of items from a Calendar. You can review the code in the download here. You also have to execute a T-SQL command to create the function; it is in the SQL script file in the download.

To execute the TVF, execute the following script:

SELECT *
FROM dbo.fn_GetSharePointCalendar(
'http://192.168.2.66/_vti_bin/Lists.asmx',
'{A67891C7-7690-43F9-B115-DC419888080A}')

The second parameter is the list name which is a GUID; you get this value by executing the fn_GetSharePointLists function. You will see output that looks something like this (only two columns are returned):